이전 글에서 이야기했듯이 MSA에서는 기본적으로
여러 서비스를 등록하고 등록한 서비스의 검색을 수행하는
서비스 디스커버리 서버(Service Discovery Server)가 필요하다.
디스커버리 서버 Client-Side 방식 중에서
가장 유명하고 구현이 쉬운
Netflix OSS Eureka 서버를 구축해보려 한다.
1. Service Discovery Server 프로젝트 생성
1-1. Service Discovery 프로젝트 생성
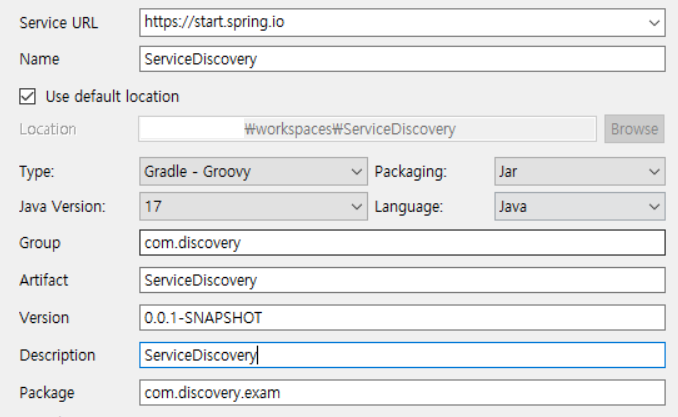
ServiceDiscovery 프로젝트를 생성하고
dependency 선택창에서 eureka를 검색해서 Eureka Server를 추가한다.

1-2. application.yml 설정
생성된 프로젝트 src/main/resources 폴더 하위에
application.properties 파일명을 application.yml로 변경한다.
해당 파일을 열어서 아래 내용을 추가한다.
server:
  port: 8761

spring:
  application:
    name: service-discovery

eureka:
  client:
    register-with-eureka: false
    fetch-registry: false
    serviceUrl:
      defaultZone: http://localhost:8761/eureka/
- register-with-eureka : 유레카 서비스에 등록 여부
- fetch-registry : 레지스트리 정보 캐싱 여부
1-3. Eureka Server 어노테이션 추가
아래와 코드와 같이 @EnableEurekaServer 어노테이션을 추가한다.
package com.discovery.exam;

import org.springframework.boot.SpringApplication;
import org.springframework.boot.autoconfigure.SpringBootApplication;
import org.springframework.cloud.netflix.eureka.server.EnableEurekaServer;

@EnableEurekaServer
@SpringBootApplication
public class ServiceDiscoveryApplication {

	public static void main(String[] args) {
		SpringApplication.run(ServiceDiscoveryApplication.class, args);
	}

}
2. Eureka Server 실행하기
이제 유레카 서버를 한번 실행해 보자.

정상적으로 서버가 실행되어 http://localhost:8761로 접속하면
위 사진과 같이 Eureka 메인 화면이 나오게 된다.
이제 서비스를 만들어 유레카 서버에 등록해보자😀
3. Eureka Server에 Service 등록하기
3-1. Service 프로젝트 생성
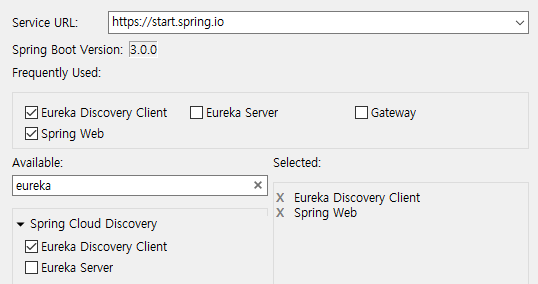
EurekaService 프로젝트를 생성하고
dependency 선택창에서 eureka를 검색해서
Eureka Discovery Client를 추가하고 Spring Web도 추가한다.

3-2. application.yml 설정
동일하게 application.properties 파일명을 application.yml로 변경한다.
해당 파일을 열어서 아래 내용을 추가한다.
server:
  port: 8090

spring:
  application:
   name: eureka-service

eureka:
  instance:
    prefer-ip-address: true
  client:
    registryFetchIntervalSeconds: 5
    disable-delta: true
    register-with-eureka: true
    fetch-registry: true
    serviceUrl:
      defaultZone: http://localhost:8761/eureka/
- prefer-ip-address : 유레카 서버에 애플리케이션 이름에 매핑되는 호스트명 등록 여부
- registryFetchIntervalSeconds : 유레카 서버에게 서비스 정보를 가져오는 주기
- disable-delta : 유레카 서버에게 서비스 정보를 가져올 때 변경된 내용만 가지고 올지에 대한 여부
3-3. Eureka Client 어노테이션 추가
아래와 코드와 같이 @EnableDiscoveryClient 어노테이션을 추가한다.
package com.eureka.exam;

import org.springframework.boot.SpringApplication;
import org.springframework.boot.autoconfigure.SpringBootApplication;
import org.springframework.cloud.client.discovery.EnableDiscoveryClient;

@EnableDiscoveryClient
@SpringBootApplication
public class EurekaServiceApplication {

	public static void main(String[] args) {
		SpringApplication.run(EurekaServiceApplication.class, args);
	}

}
3-4. Service 서버 실행
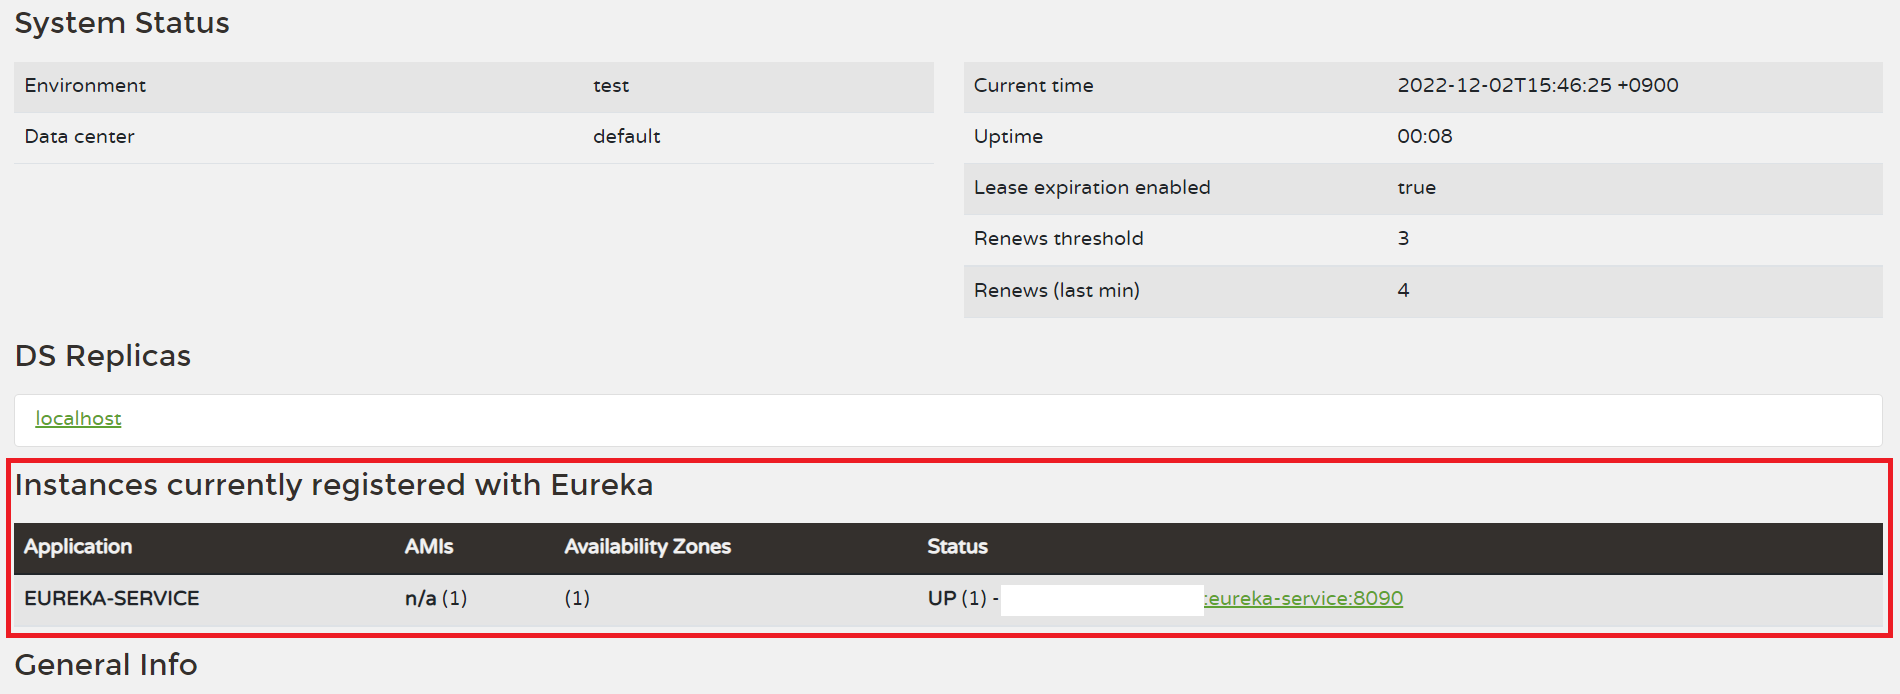
EurekaService 서버를 실행하고 http://localhost:8761로 접속하면
아래와 사진과 같이 EUREKA-SERVICE가 추가된 것을 확인할 수 있다.
(눈치챈 사람도 있겠지만 EUREKA-SERVICE는 application.yml의 spring.application.name 값이다.)
혹시나 아래와 같은 오류가 발생한다면
***************************
APPLICATION FAILED TO START
***************************

Description:

Field optionalArgs in org.springframework.cloud.netflix.eureka.EurekaClientAutoConfiguration$RefreshableEurekaClientConfiguration required a bean of type 'com.netflix.discovery.AbstractDiscoveryClientOptionalArgs' that could not be found.

The injection point has the following annotations:
	- @org.springframework.beans.factory.annotation.Autowired(required=true)


Action:

Consider defining a bean of type 'com.netflix.discovery.AbstractDiscoveryClientOptionalArgs' in your configuration.
dependency에 Spring Web을 추가하지 않아서 발생하는 오류다.
build.gradle 파일을 열어 아래와 같이 추가하고
프로젝트 선택하고 마우스 우클릭 Gradle > Refresh Gradle Project 하면 된다.
dependencies {
	implementation 'org.springframework.boot:spring-boot-starter-web'
    	...생략
}
간단한 이론에 이어 실습을 해봤는데
구현 자체는 그리 어렵지 않게 구현이 가능했다😊
이어서 API Gateway도 구현해 볼 생각이다.
'개발 이야기 > MSA' 카테고리의 다른 글
| [MSA] 모니터링 (Monitoring, Logging, Tracing) (0) | 2022.12.12 |
|---|---|
| [MSA] API Gateway 구축하기 - Spring Boot + Spring Cloud Gateway (0) | 2022.12.02 |
| [MSA] Config Server 이해하기 - Spring Cloud Config (4) (0) | 2022.11.22 |
| [MSA] Service Discovery Server 이해하기 (3) (0) | 2022.11.22 |
| [MSA] API Gateway 이해하기 - Spring Cloud Gateway (2) (0) | 2022.11.21 |